Introduction

yes I really should clean it. shhh!
This is the story of how I librebooted my ThinkPad T480, less than 24 hours after support was added to lbmk’s tree.
Note that this is not meant to be a comprehensive tutorial! Please always read the official documentation if you want to carry out this process for yourself, the steps for you and I will not necessarily be the same (as I had to build the ROM from source).
If you want to follow along with what I do, that is fine; I will provide generic instructions, but this is not a way of me saying that you should not check out the official docs here!.
For some of my own quirks while using libreboot, go here
Backstory
Some legendary figure called Mate Kukri wrote this to exploit a bug in the Intel Management Engine (you can read up on why it is evil here). Originally, it was just for a Dell OptiPlex desktop (if I remember correctly), and it abused a bug in the ME firmware to allow for arbitrary code execution (which allows one to disable Intel Boot Guard, therefore allowing me_cleaner and coreboot).
He ported it to the T480 after a little rewrite a few days ago, which is why he got this working (this was my genuine reaction I posted to my friends):
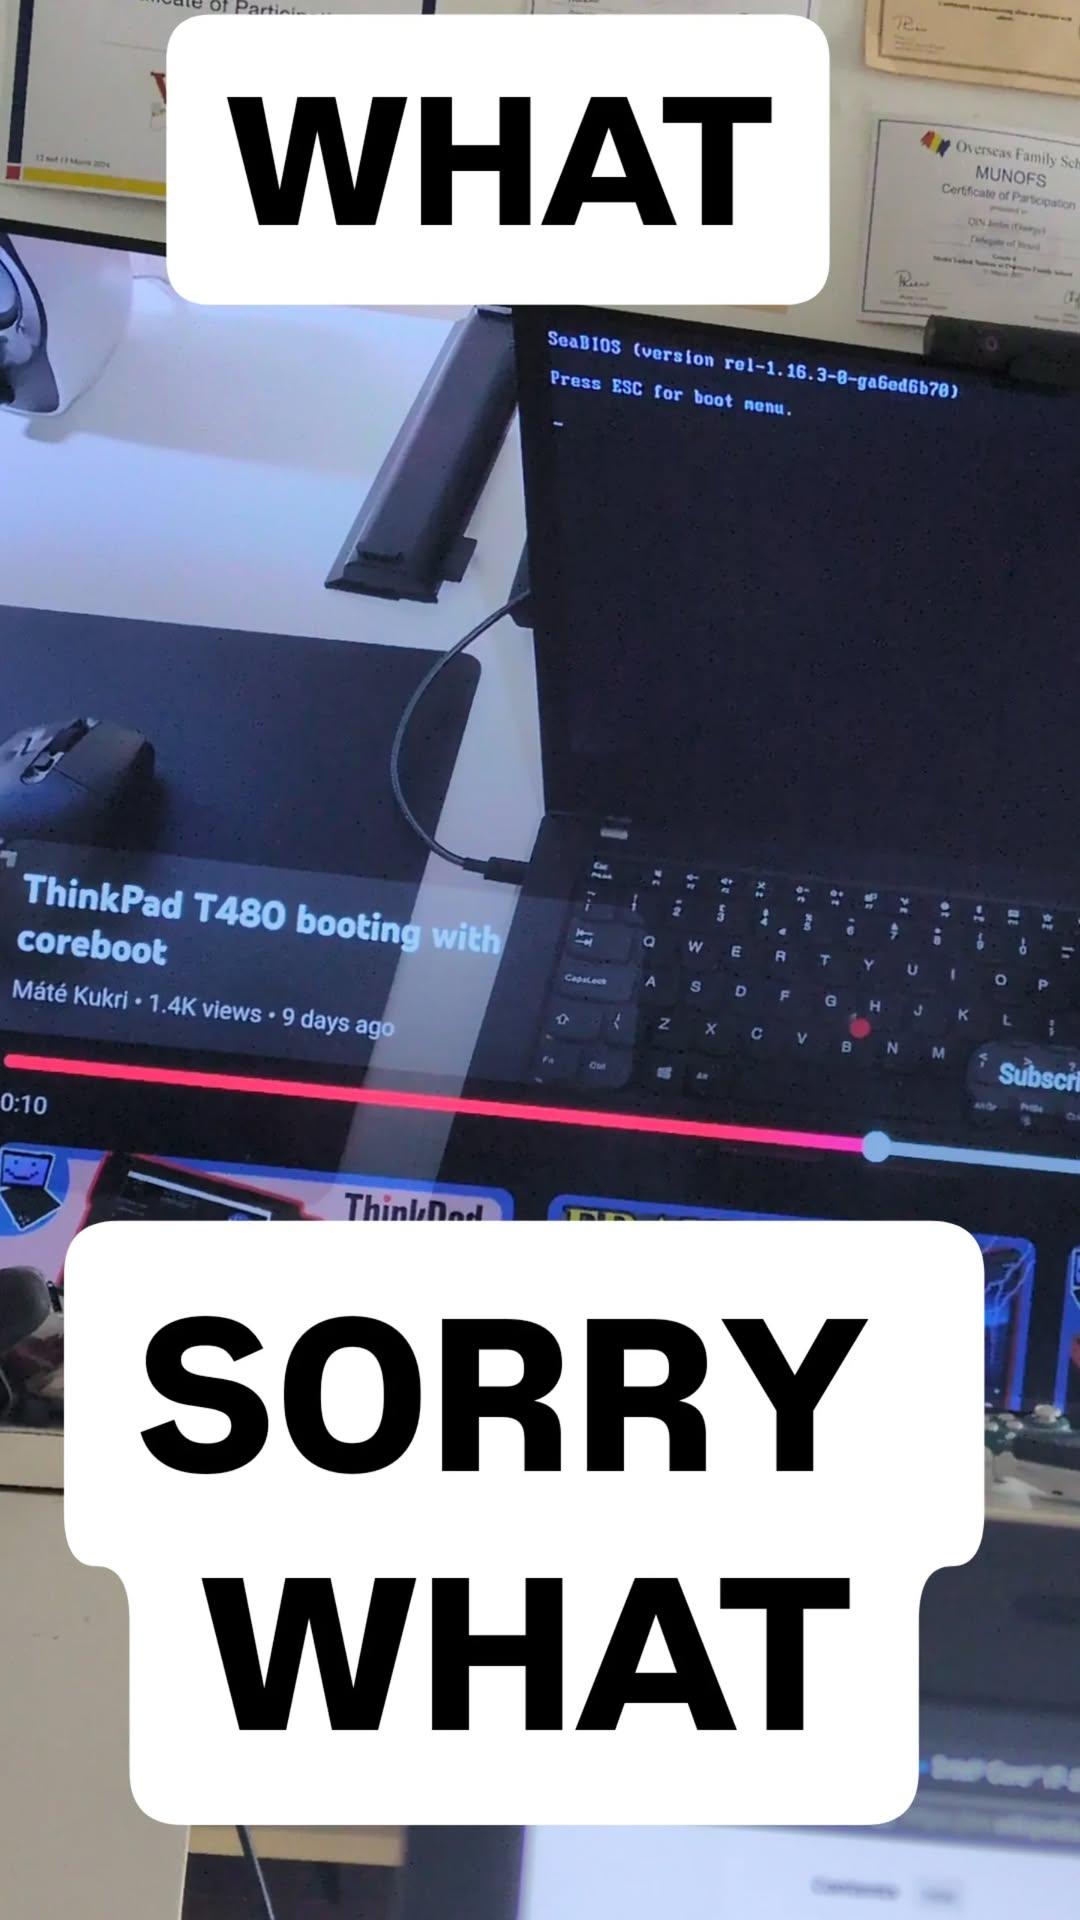
However, this commenter revealed that it was already in the libreboot tree, only after a day or two. Maybe leah rowe is just magic.
Supplies
you need:
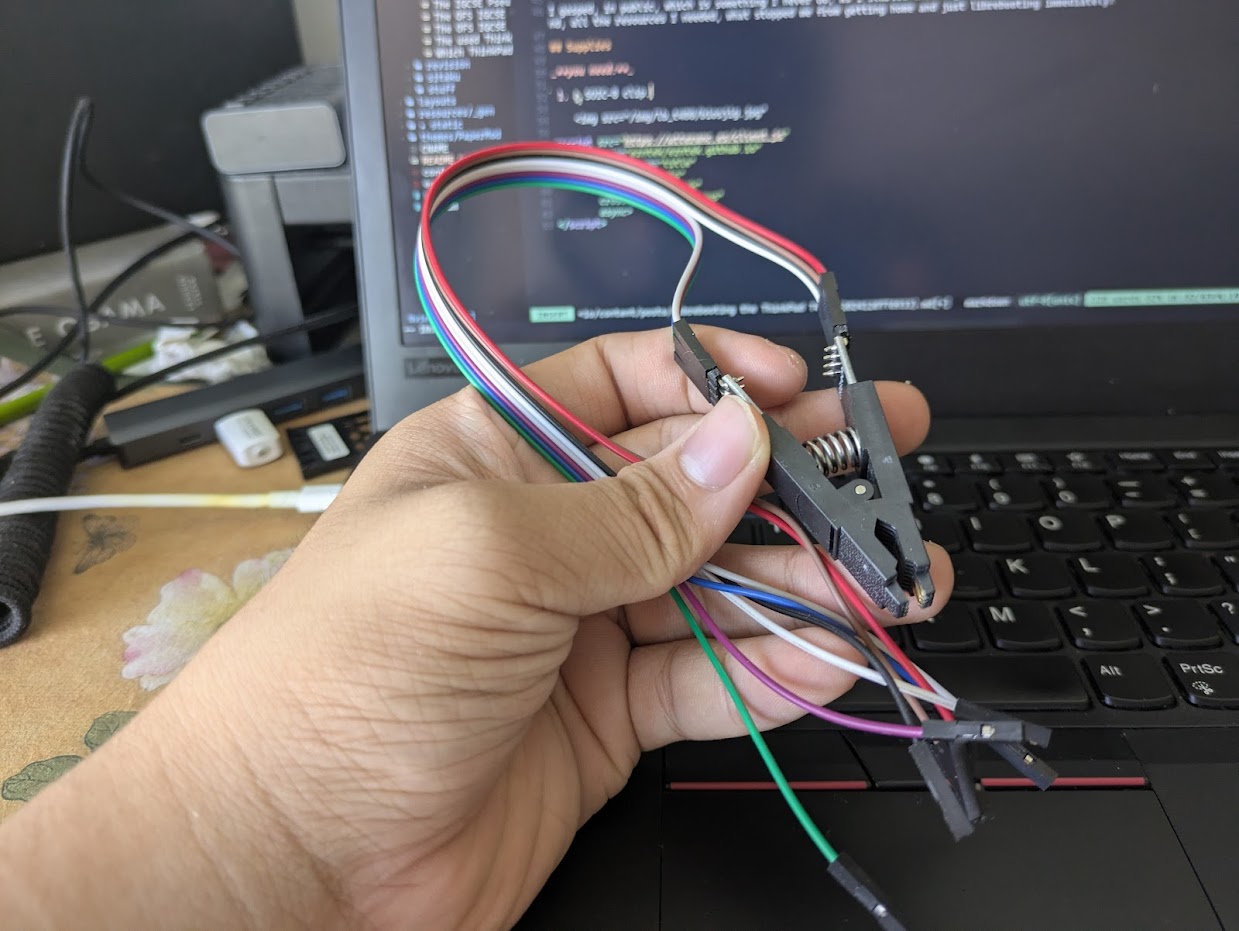
- a SOIC-8 clip.
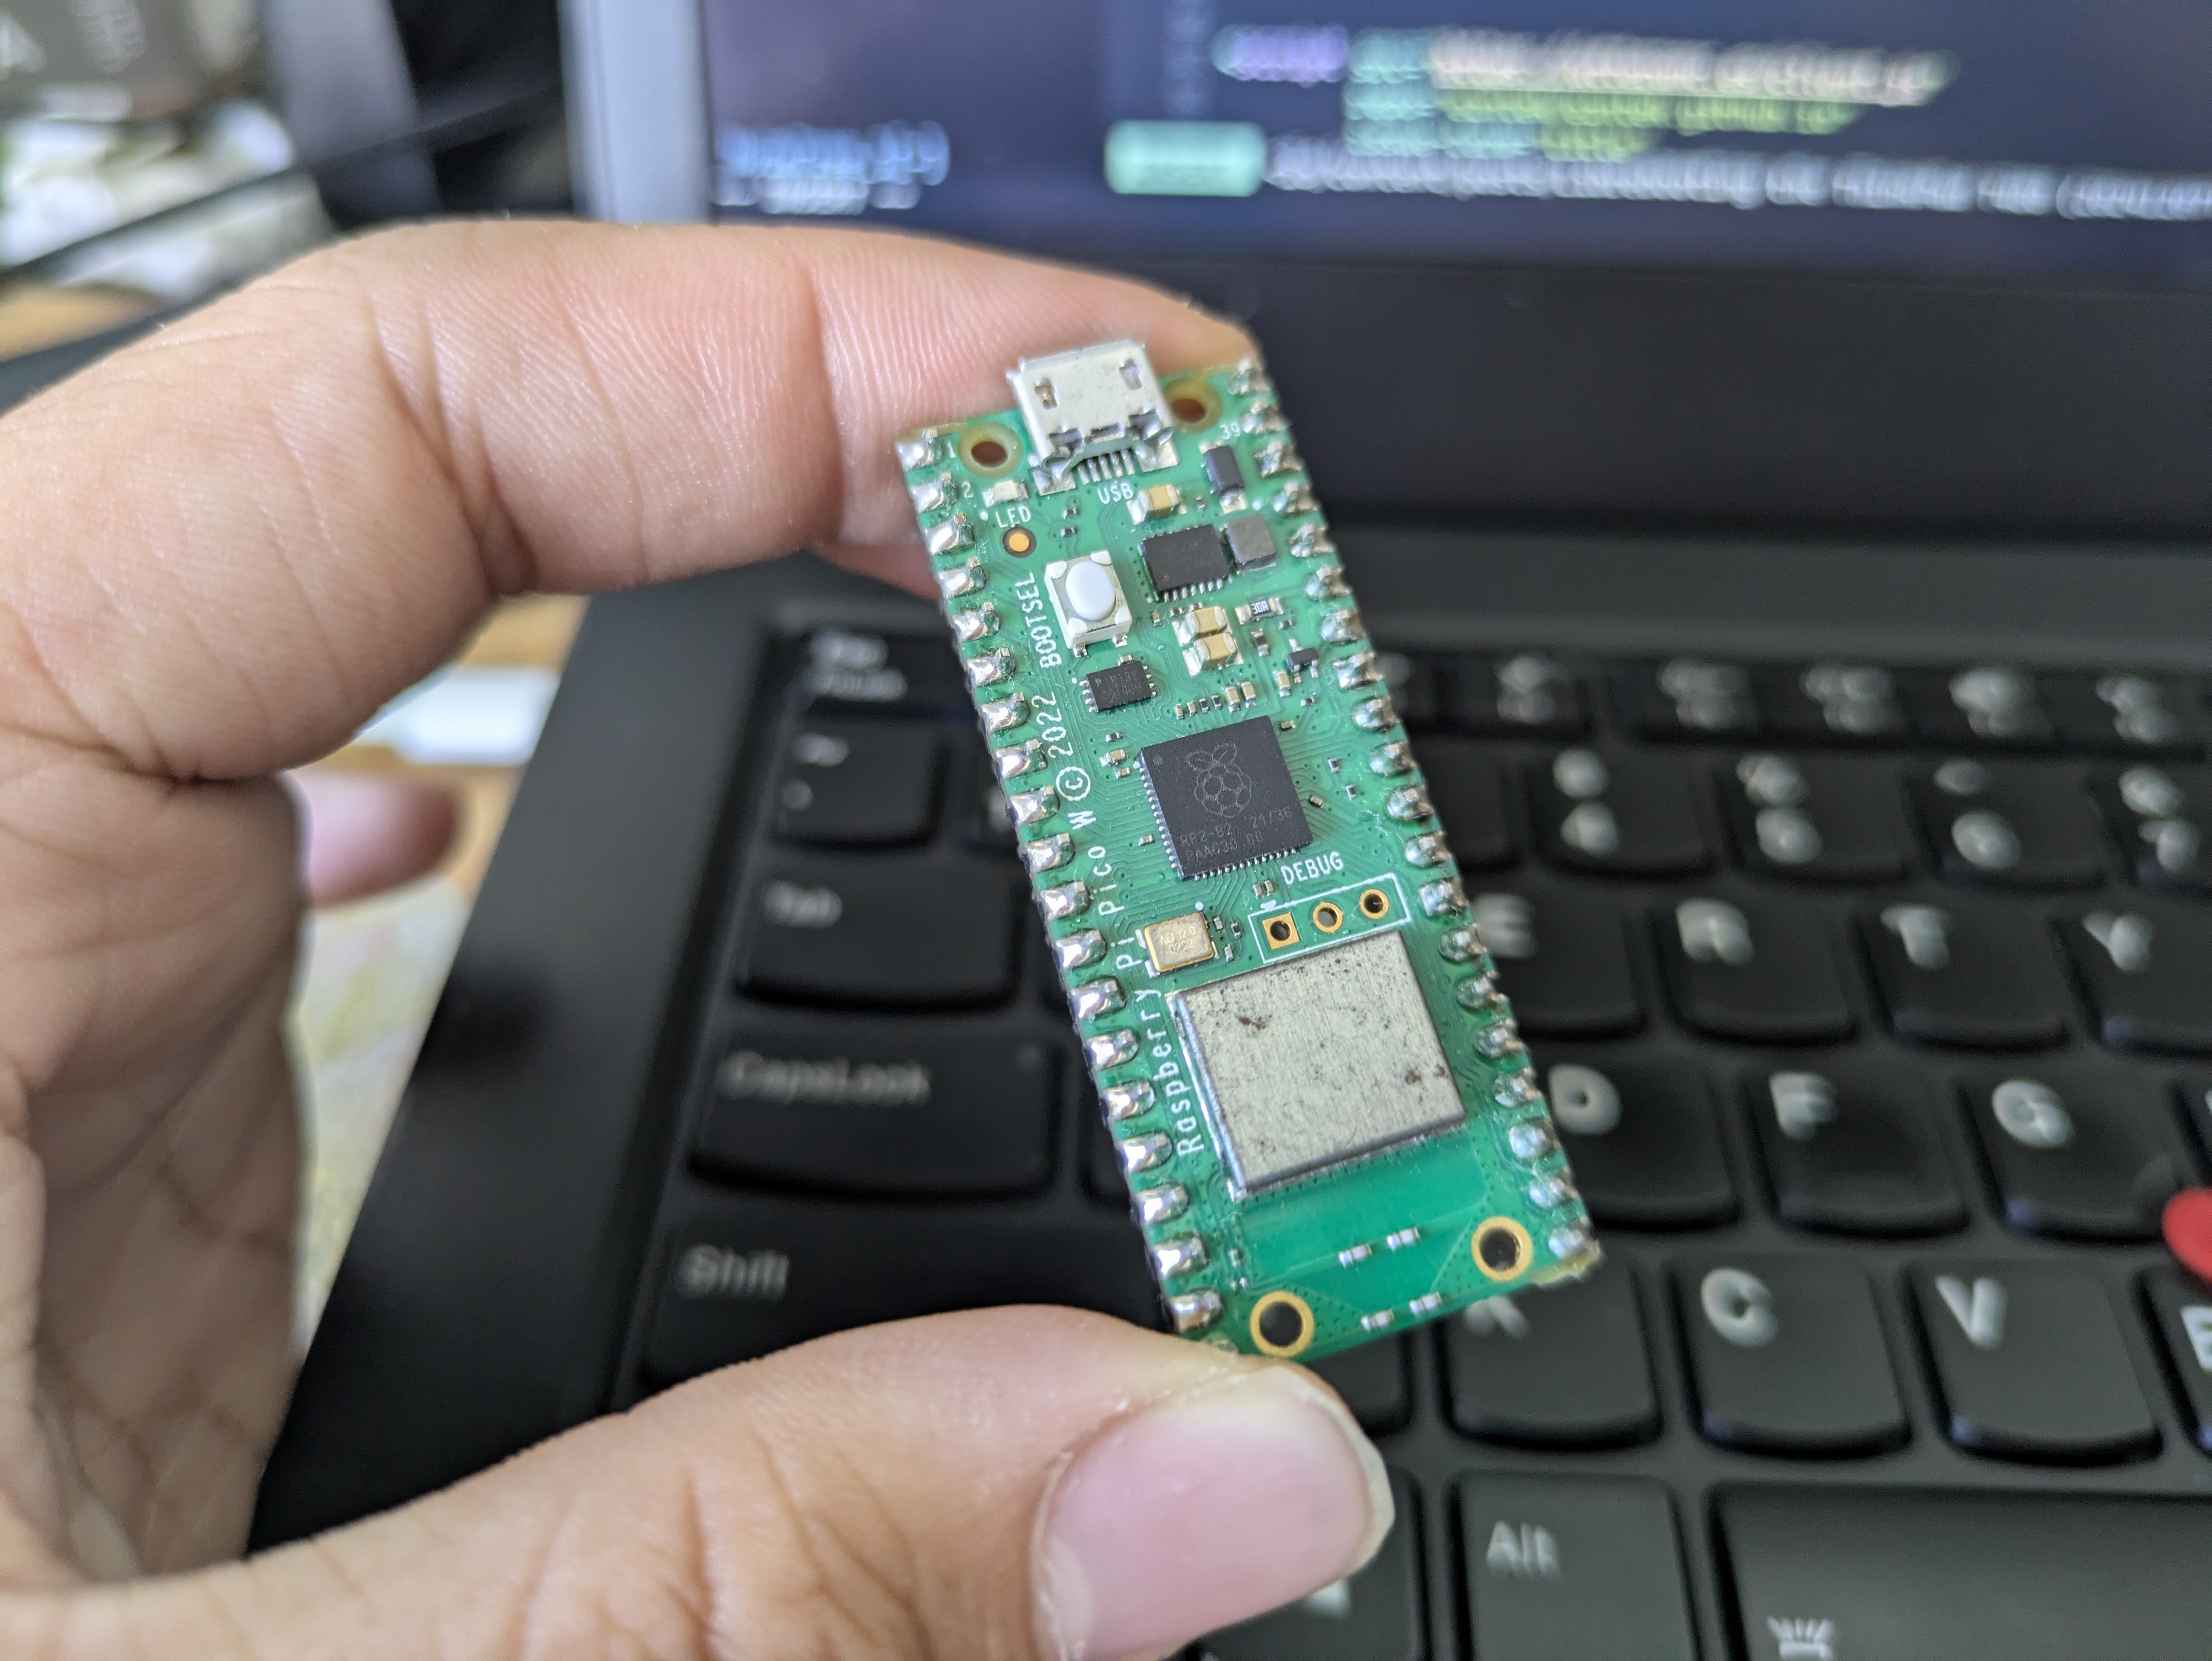
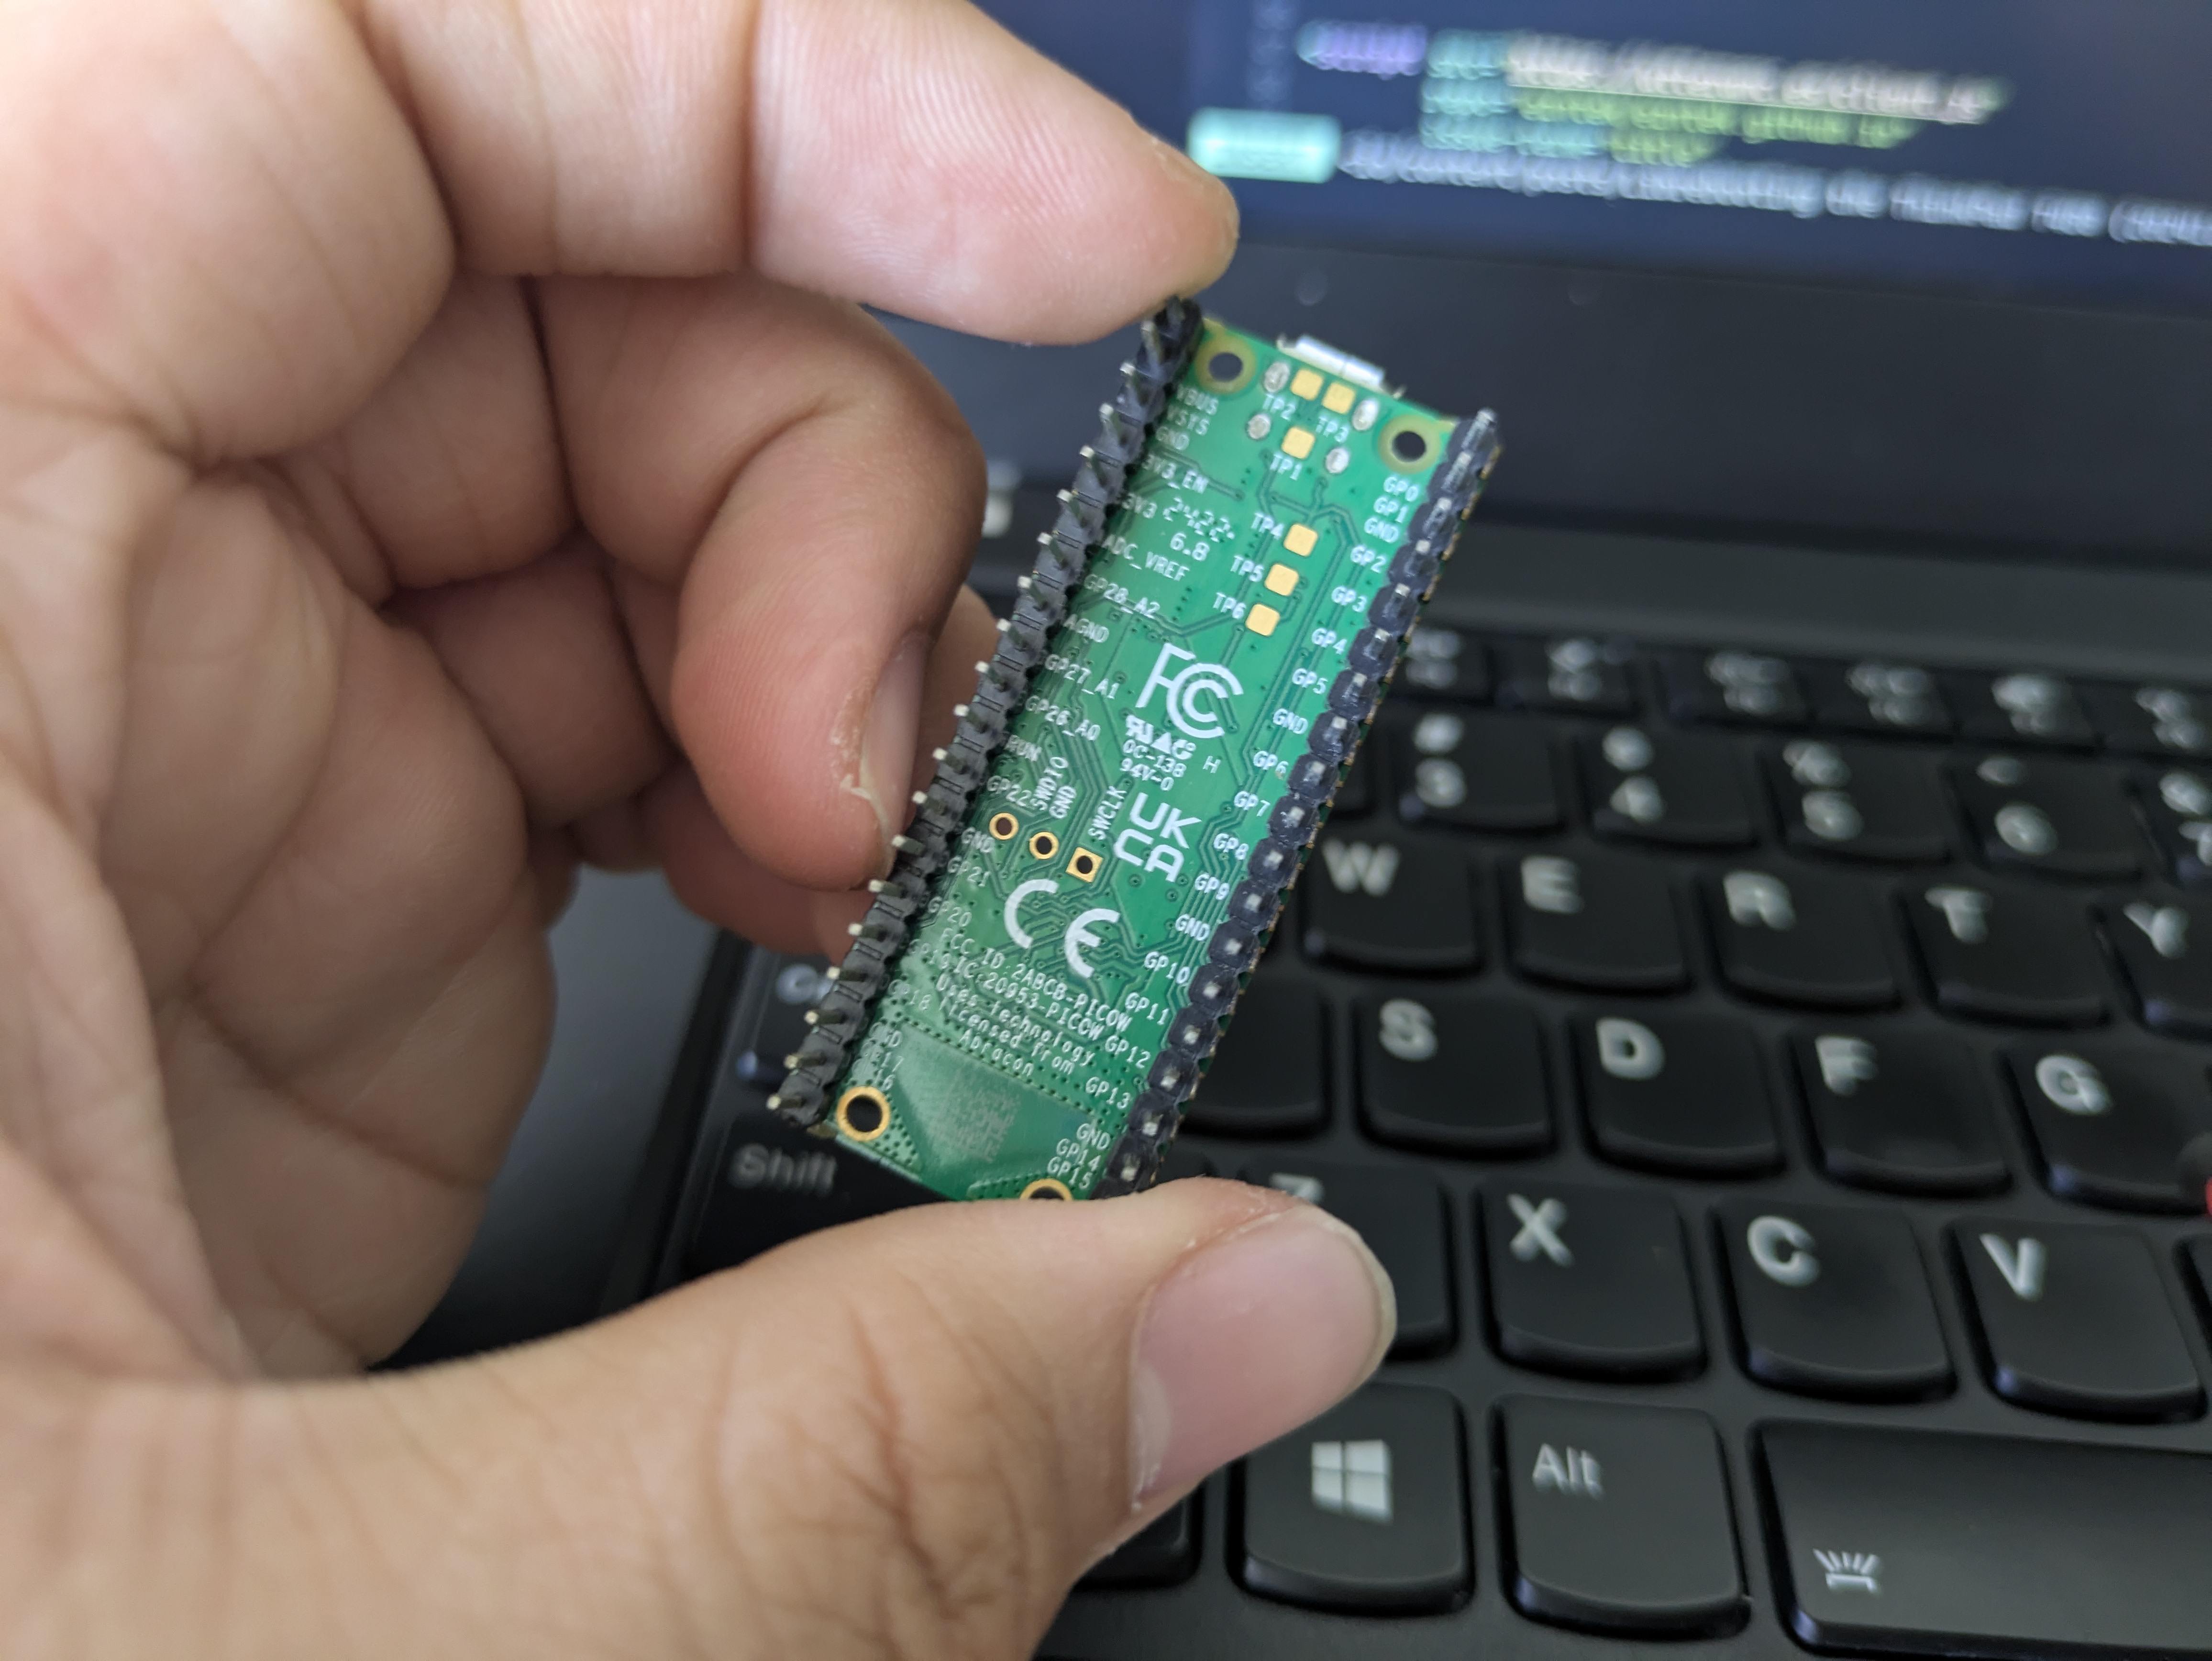
Some sort of thing that allows you to run a serial programmer on it. I used a Raspberry Pi Pico W for this, I just had it lying around one day.
Any Philips-head screwdriver. Not too small, not too big, use what is sensible and available to you.

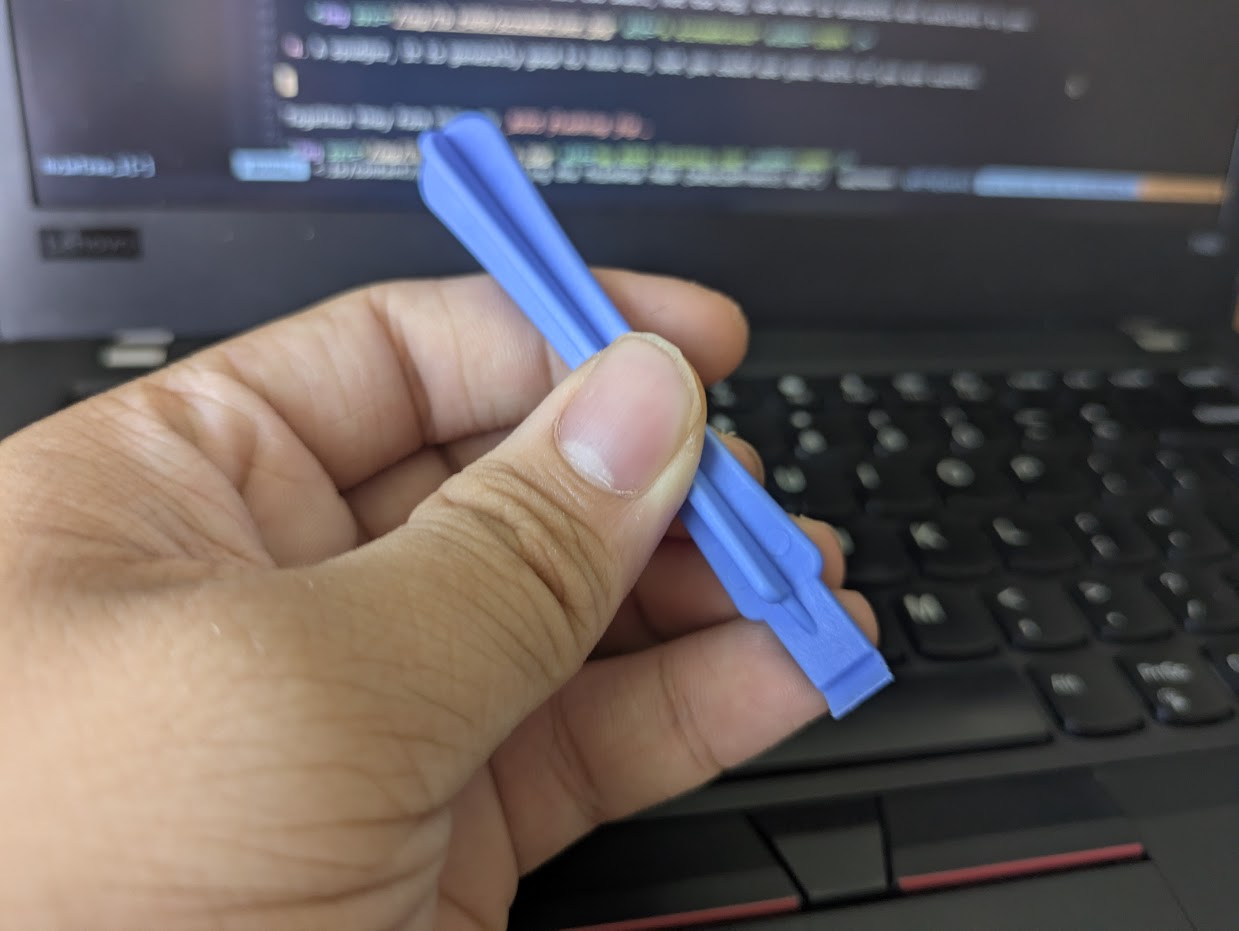
A spudger, it is generally good to have one, but you could use your nails if you are careful.
Update the stock BIOS
The process is relatively simple. I assume that you are already on some Linux distribution or a BSD, if you are on Windows, you can do it via the EXE file.
Head over here, and choose the ISO download.
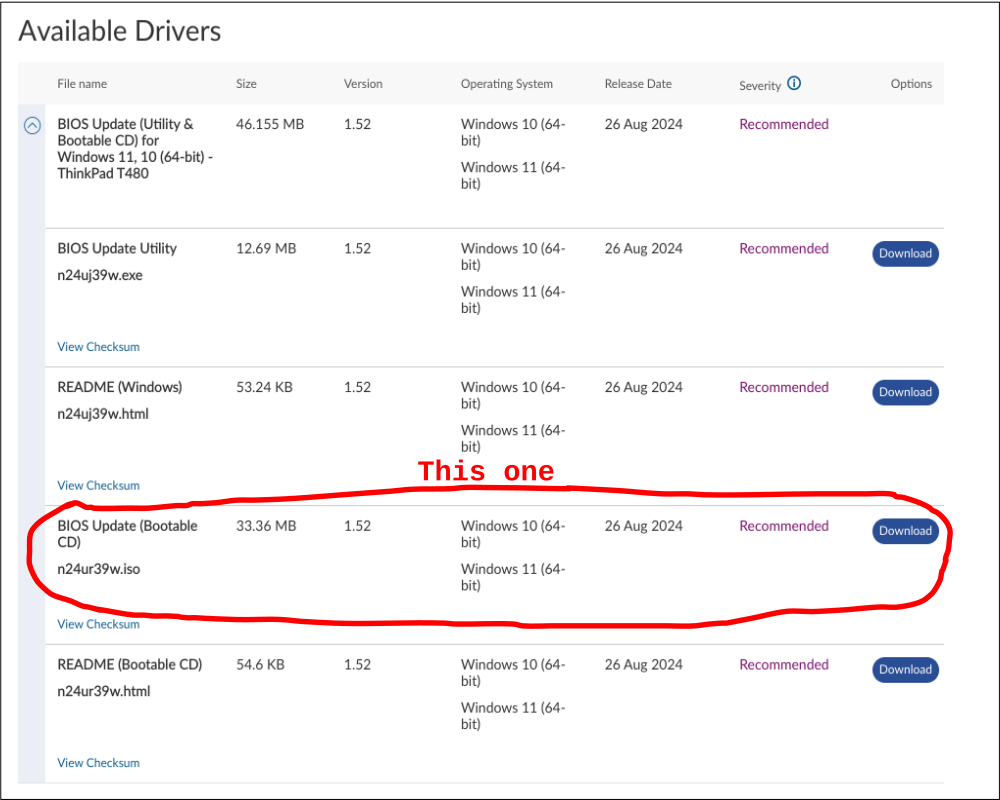
If you have a DVD/CD burner, just use something like xorriso or cdrecord to burn the ISO to a CD, and you’re good
OPTIONAL: using a USB stick
I assume that not many of you have blank DVDs/CDs lying around, along with a reader. To write the ISO to a USB, you must extract the El Torito image within the ISO, as it is not a hybrid ISO that can be dded to a USB stick.
Go to this link and fetch the geteltorito.pl script, and save it somewhere on your computer. Then, make it executable. The below commands does this:
curl -fL -o geteltorito https://raw.githubusercontent.com/rainer042/geteltorito/refs/heads/main/geteltorito.pl
chmod +x geteltorito
Then, extract the El Torito image by running the utility, like so:
./geteltorito -o t480_bios_update.img /path/to/your/downloaded.iso
Do replace the downloaded ISO path with the actual path to your ISO.
Write it to a USB stick however you want, I use dd:
(this command should be as root)
dd if=t480_bios_update.img of=/dev/sdX bs=4M conv=fsync status=progress
where sdX is your storage device.
Booting the BIOS updater
Apologies for the lack of images!
Make sure that you allow the BIOS to be end-user-flashed in the stock BIOS, and also enable legacy boot.
Boot from the device stick by spamming <F12> and choose the appropriate entry. Make sure you have at least one battery in your system charged, and the AC connected! The program will not let you continue if you do not have both of those things satisfied.
Select Option 2, and follow the instructions. Your computer will reboot into a flash utility, make sure you do not unplug your BIOS update storage device!
It should look something like so:
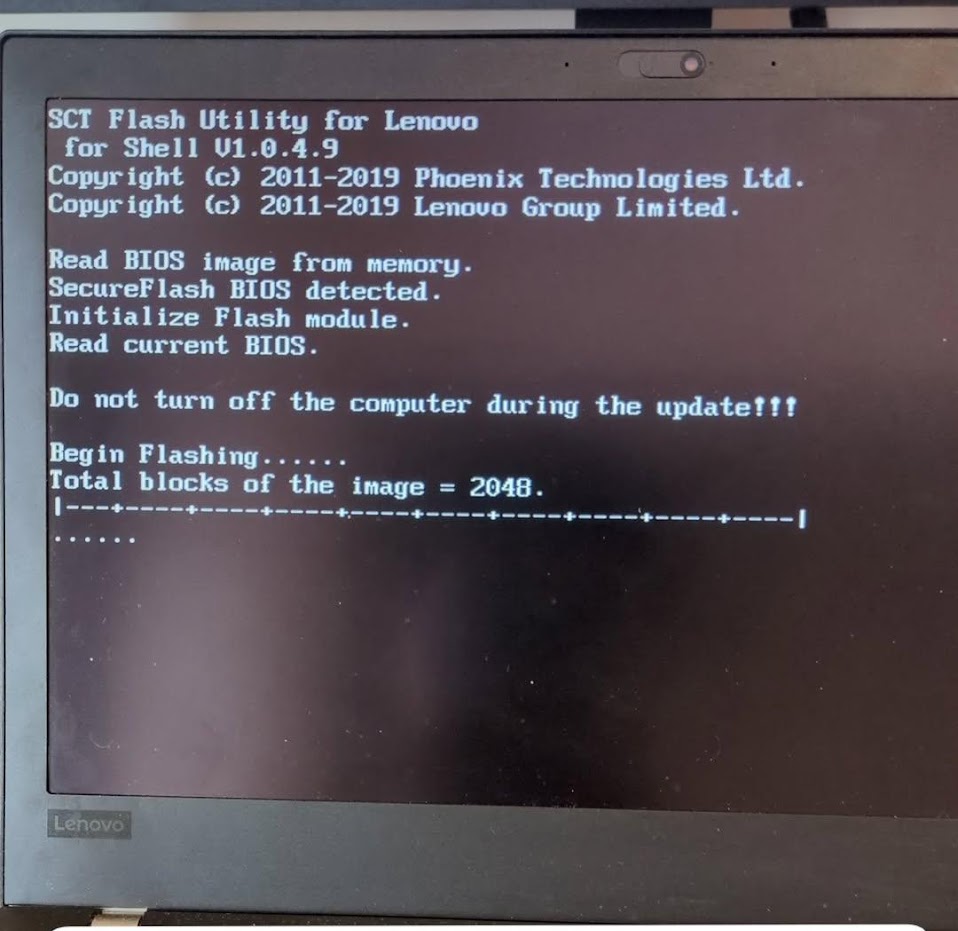
When you have rebooted your machine, you’re good.
Dumping the stock BIOS
It generally is a good idea to have a backup of the stock BIOS, unless if things go seriously wrong. If you are somehow following this “guide” to coreboot your machine, you will need that as a part of the build process (but not for libreboot!)
Wiring the flasher
This will vary depending on the microcontroller/flashing device you use. For the Pi Pico and Pico W, you must have pico-serprog installed on it first.
To wire the SOIC-8 to the programmer, use the following diagram:
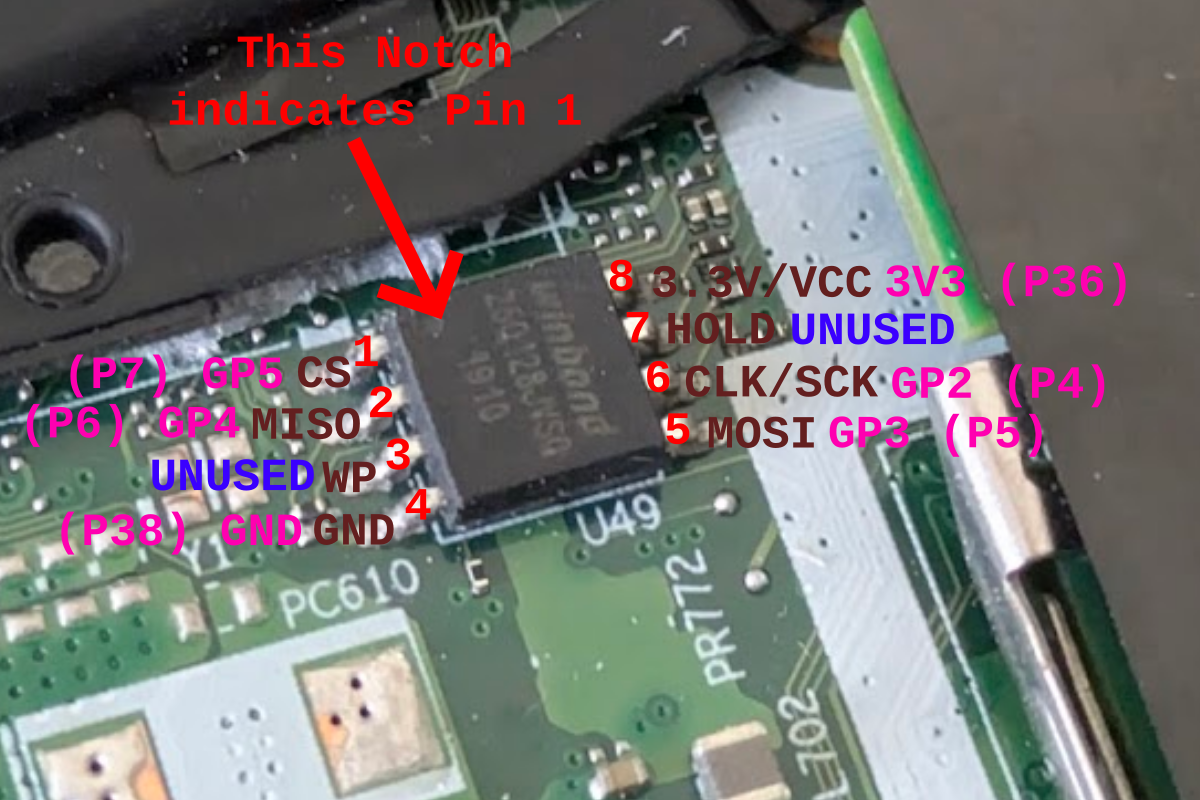
Pink corresponds to the pin on the Raspberry Pi, Bright red indicates the pin number on the chip and the dark red indicates what the pin is.
Here’s a table:
| Chip Pin | Chip Pin Number | Raspi Pin | Raspi GPIO Pin number |
|---|---|---|---|
| CS | 1 | GP5 | 7 |
| MISO | 2 | GP4 | 7 |
| WP | 3 | Unused | Unused |
| GND | 4 | GND | 38 |
| MOSI | 5 | GP3 | 5 |
| CLK/SCK | 6 | GP2 | 4 |
| HOLD | 7 | Unused | Unused |
| VCC | 8 | 3V3 | 36 |
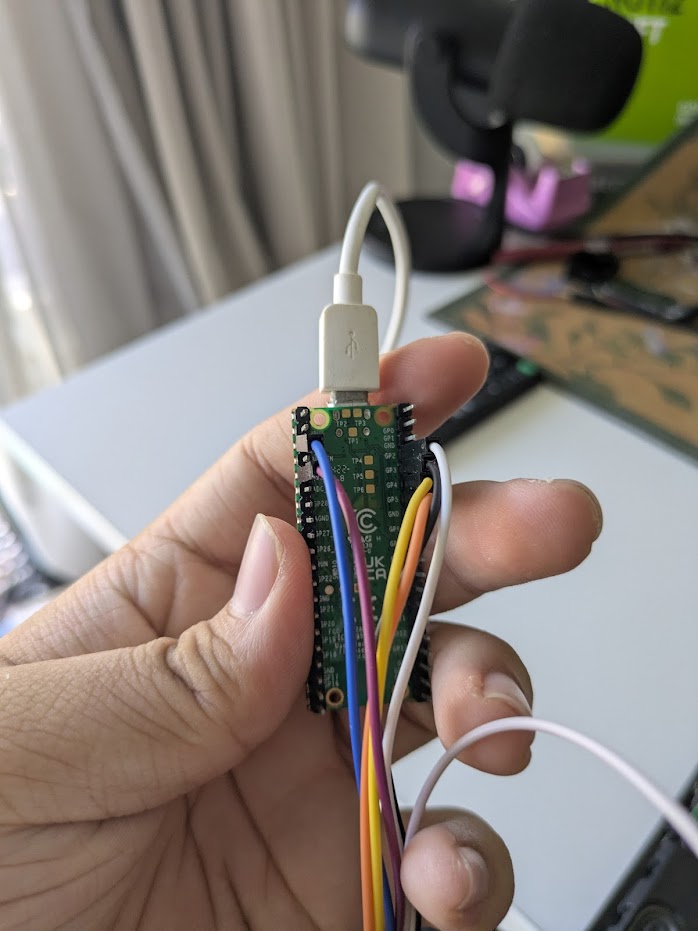
After wiring, they form this, what I’d like to call my BIOS flashing jig.
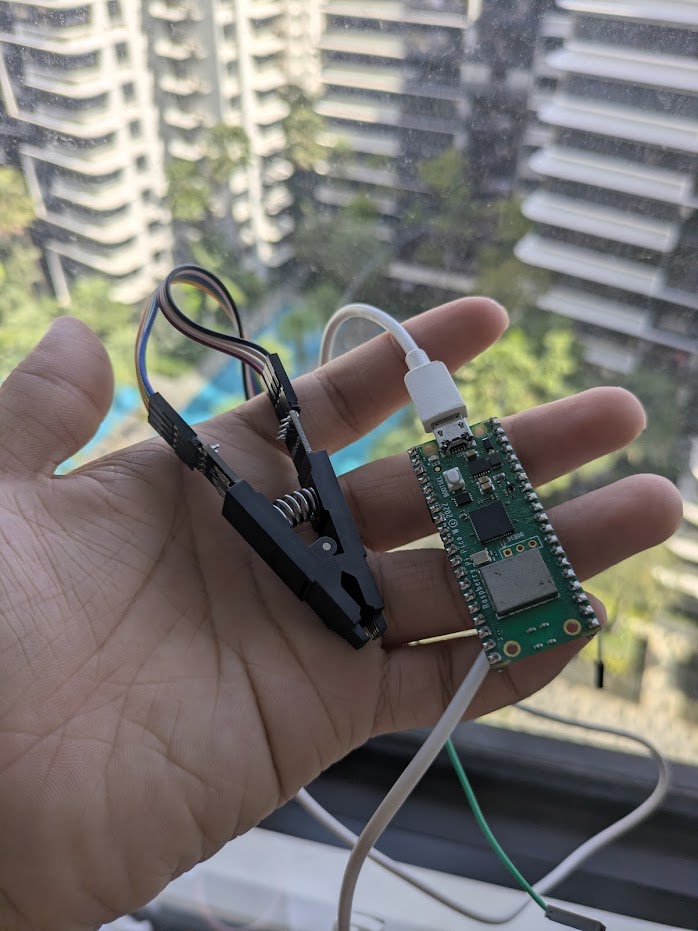
The back sohuld look something like this:
Taking some dumps
No, not excretion.
NOTE: flashrom. Libreboot standardizes on flashprog, but I cannot find a good reason as to why leah does this (I was on IRC yesterday, somebody brought it up but to my knowledge, leah did not respond).
Connect the flasher to the chip, simply press on the plastic portion of the SOIC-8 clip open, and make sure the bottom portion of the clip is completely flush with the board, with all pins contacting the chip.
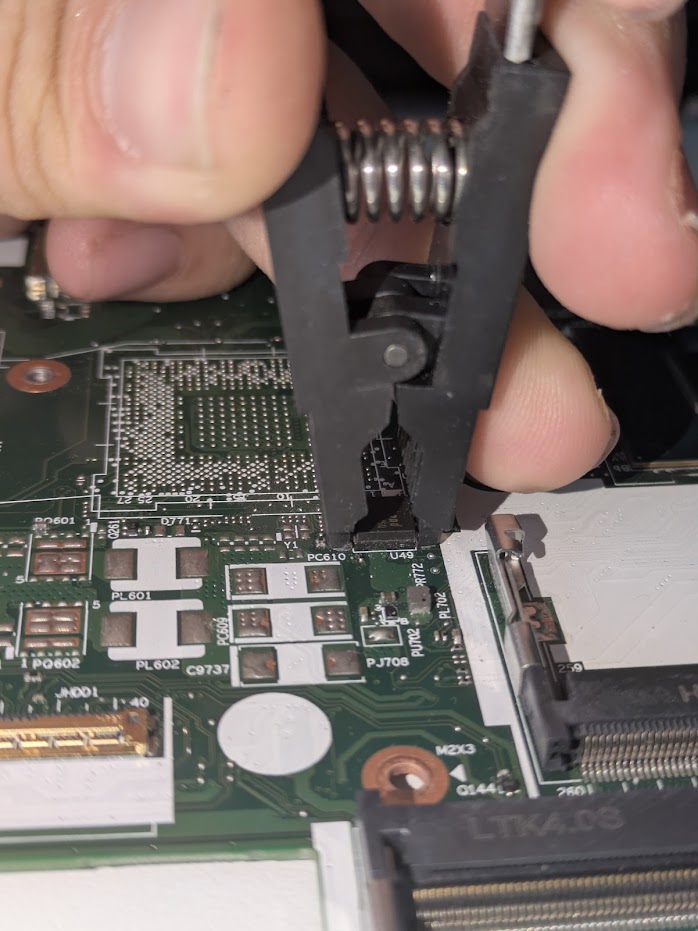
ONLY THEN, do you connect the power. NEVER CONNECT YOUR FLASHER TO YOUR COMPUTER BEFORE CONNECTING THE CLIP TO THE CHIP! YOU MIGHT FRY YOUR CHIP!
Determine the model of flash chip you have. I have a Winbond
W25Q128.V, but you may have a macronix chip. Use your phone’s flash to take a zoomed in picture of the chip, and try to decipher the code.Issue the flashrom command. As root:
flashrom -p yourprogrammer -c "your chip model" -r t480_stockbios_1.binSince I use a raspberry pi pico and
pico-serprog, and I have aW25Q128.Vchip, I issuedflashrom -p serprog:dev=/dev/ttyACM0 -c "W25Q128.V" -r t480_stockbios_1.binRepeat until you have 3 dumps. Change the filename between dumps, i.e.
-r t480_stockbios_1.binto-r t480_stockbios_2.bin, etc.Run the following command:
sha256sum t480_stockbios*.binyou should see some checksums, like so:
a7742cedf85706cafad984e555c0dc3dda9854855fcd131aadb4dd92a320ab00  t480_oldbios_a.bin
a7742cedf85706cafad984e555c0dc3dda9854855fcd131aadb4dd92a320ab00  t480_oldbios_b.bin
a7742cedf85706cafad984e555c0dc3dda9854855fcd131aadb4dd92a320ab00  t480_oldbios_c.bin
If they are not all identical, remove all of your dumps and try steps 3-5 again until all your checksums match. this is to make sure you have 3 clean dumps.
Compiling with lbmk
NOTE: you might as well use the libreboot docs for the T480 and inject vendor firmware into a prebuilt tarball. As of writing this, release 20241206 is already out, which has T480 binaries. Even if you want to build a rom with lbmk, you might as well use the docs. They are really good! This section will highlight my unique experiences, becuase I compiled the rom before leah even released the tarballs.
NOTE: go here to skip compilation to the part where I change the MAC address
Things began simple. I just cloned lbmk:
git clone https://codeberg.org/libreboot/lbmk
cd lbmk
and followed the instructions on the site.
I had used lbmk before, so I did not need to ./mk dependencies arch (I was building on my Artix god-PC, with an i7-14700KF. I really did not want to build it on one of my older ThinkPads).
Like a good and sane person who likes reading the f*****g manuals™, I read the f*****g manuals™.
This is what the guide said after I read all the other sections:
Build ROM image from source
The build target, when building from source, is thus:
./mk -b coreboot t480_fsp_16mb
./mk -b coreboot t480s_fsp_16mb
NOTE: The T480 and T480S may be similar, but they do have several critical differences in their wiring, so you MUST flash the correct image. Please choose one of the above build targets accordingly.
I was aware of the pitfalls, like no thunderbolt, no brightness keys, etc. But due me having done all this prep (and me generally loving libreboot as a project), I continued anyways.
I issued
./mk -b coreboot t480_fsp_16mb
as I was told. Things went smoothly.
…until I hit this error.
--- TRUNCATED ---

Not a supported Inno Setup installer!
Done with 1 error.
Dell PFS Update Extractor v6.0_a16

*** df735a24242792bf4150f30bf0bd4fdbdc0fb6bf0f897ea533df32567be8e084006d692fb6351677f8cc976878c5018667901dbd407b0a77805754f7c101497c

    Extracting Dell PFS 1 > df735a24242792bf4150f30bf0bd4fdbdc0fb6bf0f897ea533df32567be8e084006d692fb6351677f8cc976878c5018667901dbd407b0a77805754f7c101497c > Firmware

Done!
config/data/deguard/mkhelper.cfg missing
Downloading project 'deguard' to 'src/deguard'
src/deguard missing
fatal: repository '/home/ezntek/Sources/apps/lbmk/cache/repo/deguard' does not exist
ERROR script/trees: !clone /home/ezntek/Sources/apps/lbmk/cache/repo/deguard /home/ezntek/Sources/apps/lbmk/tmp/gitclone
Cached clone failed; trying online.
Cloning into '/home/ezntek/Sources/apps/lbmk/tmp/gitclone'...
remote: Total 181 (delta 0), reused 181 (delta 0)
Receiving objects: 100% (181/181), 62.47 KiB | 120.00 KiB/s, done.
Resolving deltas: 100% (46/46), done.
HEAD is now at de176a7 Add note about DCI bit
Applying: t480s delta
Traceback (most recent call last):
  File "/home/ezntek/Sources/apps/lbmk/src/deguard/./finalimage.py", line 76, in <module>
    with open(args.input, "rb") as f:
         ^^^^^^^^^^^^^^^^^^^^^^
FileNotFoundError: [Errno 2] No such file or directory: '/home/ezntek/Sources/apps/lbmk/tmp/me.bin'
ERROR ./vendor: Error running deguard for /home/ezntek/Sources/apps/lbmk/vendorfiles/t480/me.bin
ERROR ./vendor: Error running deguard for /home/ezntek/Sources/apps/lbmk/vendorfiles/t480/me.bin
ERROR script/trees: Unhandled non-zero exit: ./vendor download t480_fsp_16mb
ERROR ./mk: excmd: script/trees -b coreboot t480_fsp_16mb
Alright I guess. It complained about missing vendor files such as the ME. maybe I had to extract it with ifdtool?
…so I ran ifdtool --platform sklkbl -x wherever/the/bios/was.bin
and copied flashregion_2_intel_me.bin to vendorfiles/t480. But then it gave me a new error.
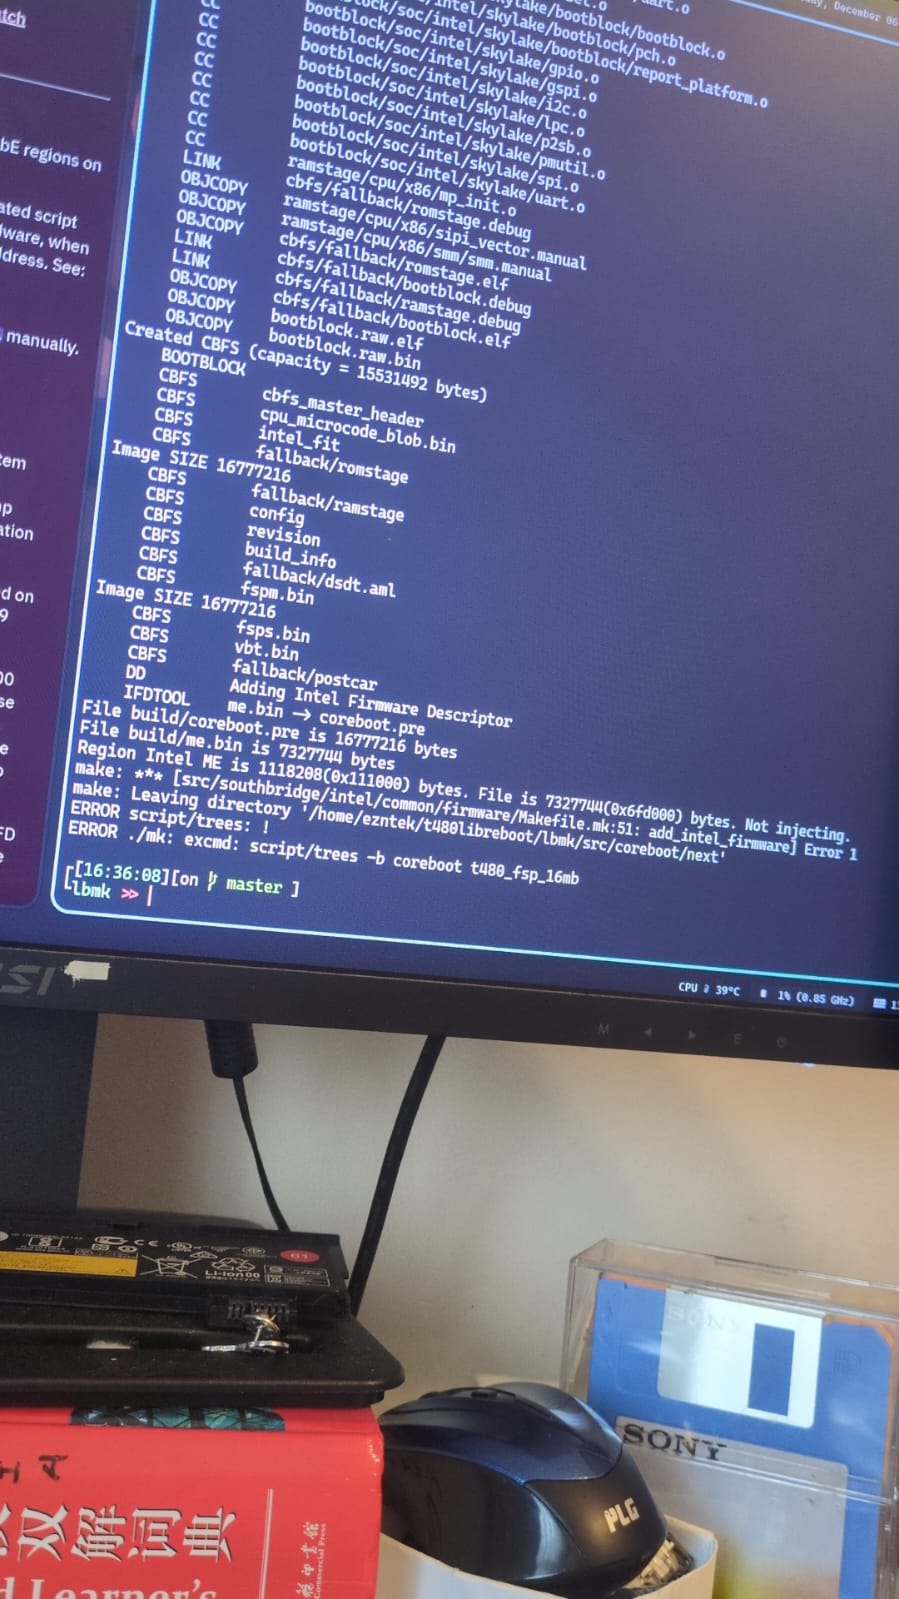
(sorry for not having a proper text log for it, I couldn’t find the pastebin paste I had it on :/)
The ME region was too big. At this point, I was completely confused and dumbfounded; which is why I took to IRC.
NOTE: go here to skip my encounters on IRC
#libreboot on libera.chat: oh dear
On the libreboot website, they recommended people to come to #libreboot on IRC for help…which is what I did. FYI, I almost never use IRC (although I am planning to become more active on IRC networks).
I expected at least a slightly nice greeting from the IRC people, but that was when I found out that these people are RTFMers. Mad respect for that, but I already read the manual(s) back to back for each applicable thing, and I was sure I knew what I was doing.
Here were the things they told me:
- RTFM (but I already did!)
- Install dependencies (but I already installed them!)
- Install dependencies again (but I just did a full system update?)
I think at that point, everyone was clueless. I could tell that fuel (a mod) was a bit clueless and started asking leah. They did eventually discover that I used Artix and not arch, and they immediately denied further assistance (expected, they are 2 different distros, arch supported and Artix not).
But I was still skeptical. Those distros literally share the same repos (at least I made it do so), and I have successfully used lbmk on Artix once or twice before. Still, no luck.
PSA
Don’t paste raw output on IRC! horrible idea, you will get people barking at you. I did not know, but they could have reminded me a little better (because I am not an IRC user!!)
Just use pastebin—
Back to IRC shenanigans
They began telling me to try it on debian. I said that I did not want to and I was certain that my distro was not the problem. They insisted. Alright, I would try on debian sid. No luck! I got missing candidate errors (my favorite!).
I then started bargaining, which really does make sense in this case. Sure, it is an unsupported distro, but why are the dependencies causing me.bin to not be present? the typical process for obtaining any ME dump would be
- somehow get an official BIOS image (in this case, download)
- chop the rom up to extract the binary
- copy it to
vendorfiles/t480
Why would the dependencies (like GCC libraries and other coreboot dependencies) matter? The process would literally just be
curl -fL -o bios.bin https://some.shady/link
magicalextractionutility -o me.bin bios.bin
cp me.bin vendorfiles/t480
I suspected that the magical extraction utility would be bundled with coreboot. They did say no, however (which is true, but one utility that is used, innoextract was in the dependencies).
They then told me void was a supported distro, so I tried it again. Same error.
at that point, even leah became confused, so they decided it was a good idea to clone a fresh lbmk tree1.
Turns out they made a commit that tried to do a shortcut to copy me.bin, but that didnt work! one local git revert later, it built!
Back to compiling libreboot
Libreboot does not provide a MAC address for the Gigabit Ethernet (gbe) ROM, which means that you cannot have many librebooted machines on the same network. Therefore, it is advised to change it.
Libreboot has documentation for this.
This is the process:
- Have
ifdtoolandnvmutilcompied somewhere ifdtool --platform sklkbl -x libreboot.romto extract the gbe regionnvm flashregion_3_gbe.bin setmac aa:bb:cc:dd:ee:ff
where aa:bb:cc:dd:ee:ff. I recommend you take the first 3 parts of the MAC address, but leave the rest as ??, like so:
nvm flashregion_3_gbe.bin setmac aa:bb:cc:??:??:??
To keep the correct network card vendor, but change the device specific address. I did not do this, but I will the next time I flash the computer.
Flash!
This process will take a while, as flashrom does not tell you when it starts writing the flash chip. Run the following as root:
flashrom -p yourprogrammer -c "your chip model" -w your_libreboot_variant.rom
And make sure your chip clip is sat on the chip tightly! If the bottom of the clip appears to not have crimped the chip at the very bottom anymore, but has slid up and crimpeed the top, that means your clip is about to die, and you have to hold the chip clip in place after you put it on, and press down with force to make sure it does not fly off.
Usage report
That is about as simple as librebooting gets.
In terms of using the T480 (for buyers who want to try it out):
CPU performance is good. I recommend the
i5-8350U, as it has the best CPU performance to price ratio, if buying used. It will be a large jump from a haswell/ivy bridge M series dual core i5 and a relatively good jump from a dual core i7.- If you are using a quad-core i7 (MQ or QM series chip from Ivy Bridge/Haswell), the performance boost is not very noticeable and is marginal.
Either way, power efficiency will skyrocket, as these are U series chips after all.
Get 16GB of RAM: tihs is basically a given, make sure you have at least 16. 8 will bottleneck the CPU, and 32 is too much for ost tasks.
If youre lucky and get a T480 with the 2280 SSD bracket, you will see a boost in disk speeds, but if you only do tasks such as office work/programming, a normal SATA SSD will have an identical performance. If you want, you can put an M.2 A+E key 2242 SSD into the WWAN slot for extra storage.
AVOID TN PANELS LIKE THE PLAGUE: If buying used and you are not planning to upgrade the panel, please avoid the TN panels, because they will make your T480 experience horrendous and near unbearable. I recommend the following panels if you upgrade it:
- NE140FHM-N62: no mounting brackets, has enough clearance and is 96%DCI-P3 (1.07 billion colors!), 30 pin eDP, non-touch, IGZO low power, 500 nit and is 1920x1080. It should have 60 and 48hz support. I have not tested it, but in theory this should be the best panel.
- NE140FHM-N61: no mounting brackets, has enough clearance and is 100%sRGB, 30pin eDP, non-touch, IGZO low power, 400 nit and is 1920x1080. Supports 60 and 48hz and is quite bright. I have tested this one.
- N140HCG-GQ2/GR2: no mounting brackets, has enough clearance, 100%sRGB, 30pin eDP, non-touch, IGZO, has pretty damn bad backlight bleed, is 400 nit but quite dim, and is 1920x1080. I have tested this one.
- B140HAN01.0/.1/.2/.3: has mounting brackets, has enough clearance, and is 45%NTSC, 30pin eDP, non-touch, not low power, 250~300 nits and is 1920x1080. Colors are quite washed out and is okay-bright. All “compatible” panels are acceptable, much better than a TN. I have tested the B140HAN01.3 and the N140HCE-EAA (a compatible).
you could go for more exotic options, including 2.5k panels like the B140QAN02.0 (which I used, but swapped out, because it has clearance issues and creates 2 bulges on the bezel. Colors are amazing though) or 4k ones. Any panel higher than 1080p requires a 40 pin cable; and swapping the cable out is quite painful as you have to disassemble the hinge.
Do the glass trackpad mod if you like using the trackpad.
Make sure you have the internal battery! the PowerBridge system is extremely useful, and even if you do not intend to hotswap batteries, the extra mileage you get is quite important at times. I have a 72wH (in reality, 68 due to it being aftermarket) external 6 cell and an internal 24Wh 3 cell, which gives me 9 total cells around ~90wH. My T480 did not even come with an internal battery because Lenovo did not ship these batteries in colder countries due to chemistry™ reasons.
For daily tasks, the T480 smashes all of them, and most definitely can handle video editing, even with just the iGPU. Speaking of which, it gets over 80fps on 22 ren/22 sim chunks medium settings with sodium in a Minecraft Singleplayer world. It is portable, quite light, definitely 1-handable and is a great daily driver.
The keyboard does only have ~1.8-2mm of travel, which is unlike the classic keyboards and first gen island keyboards on Ivy Bridge ThinkPadswhich have anywhere between 2 and 2.3mm of travel. There are 3 T480 keyboard manufacturers:
- LiteOn (FRU 01HX459 for backlit): This one has the snappiest keyfeel, relatively short travel and slightly MacBook keyboard like, but still very comfortable to type on. The bottom-out is quite harsh.
- Chicony (FRU 01HX419 for backlit): This one is soft but not too soft, has a shorter tactile peak that is more drawn out, and is not that heavy. Travel is definitely deeper than the LiteOn but still with a hard bottom-out.
- Darfon (FRU 01HX449 for backlit): This one is the worst, mushy, not very tactile and keytravel is not that long either. I definitely do not recommend this one, either go with Chicony if you want the more balanced option or LiteOn if you want a snappier keyfeel.
I personally use the LiteOn and have used the chicony, and do prefer the LiteOn simply because of the tactile bump. If you have ever tried to do the classic keyboard mod, LiteOn is the equivalent to the NMB keyboards, the best-regarded within the community; and LiteOn and NMB are related (I think one bought the other, or one NMB used LiteOn switches in their classic keyboards, because apart from the keytravel, they feel very similar).
Some libreboot quirks
thinkpad_acpidoes not load correctly, just like on haswell ThinkPads. You must put the following:options thinkpad_acpi force_load=1inside a file named anything inside
/etc/modprobe.dfor the module to load correctly on boot. Else, you do not get temperature monitoring and fan control.As per the T480 libreboot page, thunderbolt does not work as of now, and the brightness keys do not register keysyms within Linux. The settings, bluetooth, kekyboard and star keys on top of F9-F12 register a
NoSymbolkeysym withinwev.Suspend works as expected.
Bluetooth is slightly wonky, as it does not automatically turn on, at least for Void Linux; despite the service being enabled. Sometimes I have to restart the bluetooth service (with
doas sv restart bluetoothd) to get things to work. Auto-pairing also does not work.The installation process is far easier than compiling a custom coreboot payload (duh)
leah added support for UEFI through U-boot, which means that you can do an EFI install of linux (I still use good-ol’ BIOS boot).
not just normal confused, leah was quite pissed off because they were trying to port libreboot to Alder lake motherboards, but things were going well. ↩︎