Intro & Recap
As of August 1st, I have been quite busy over the past few days. I went out with friends, and a lot of new hardware parts arrived, such as SOIC-8 clips (that I had to assemble), my T440p keyboard (finally!!), and other such things. This explains why I haven’t uploaded part 3 yet, but here it finally is!
Some source code examples might deviate from the actual source code at https://github.com/ezntek/foodscroller for clarity sake.
If you haven’t really read the first and second parts, I urge you to do so here and here. To summarize the second article, I met some pretty cool people and almost teamed up with them, but ended up not in the end. I didn’t have any ideas until I had a samosa during breaktime, and I started implementing my app in Vue.js.
I finished the navbar, and worked on the settings page.
Going home
This took about an hour. I had 3 choices for a bus, bus 3, 39 and 81. 81 would take the longest, as I’d have to ride the wonderfully engineered Punggol LRT (which is more like an Airport shuttle train, not a tram. It’s called an Automated People Mover System) with wonderful acceleration curves that are not jarring (sarcasm); for 2 stops, then only walking for another 10 minutes to get to the bus stop after crossing 4 crossings to board the bus. The Bus 3 bus would have taken over 10 minutes to arrive at the bus stop I had to go to, so I decided on 39.
Turns out that was quite a bad idea, I had to walk the distance of 2 LRT stops, and Google Maps routed my journey wrong. it told me to cross at a crossing that doesn’t even exist! (I had to walk back and take 2 sets of crossings, don’t ask.)
It took me an hour to get home, double that than if bus 3 came earlier. Oh well!
The nighttime programming session
This is when I got the majority of my work done. I slept at 1:30 and stopped programming at 1 and only at 1 (I came back at 9, which meant a 5 hour programming/ procrastination session), but oh well.
Finishing the settings page
I lied in the previous article. I actually only finished the settings bubble up to that point, and I did not have any of the settings stuff working.
I worked on the component props to decide the color of the bubble and whether or not to show the plus icon or not, which took a while.
To get the color to change, I had to conditionally switch out a CSS class based
on JS (TypeScript) state. Luckily, Vue.js has this thing called the v-bind directive,
where you can write something like
<a v-bind:href="$props.activeLink">My Link</a>
to actually bind JS state to an HTML prop. Its short form looks as follows:
<a :href="$props.activeLink">My Link</a>
which is what I used to conditionally swap CSS.
Interlude: CSS Naming Conventions
Despite how you may have a scoped CSS block in Vue, like
<style scoped>
.title {
    font-weight: 800;
}
</style>
For some reason, on my end, If I defined this CSS class in a child SFC, it would still apply the CSS class in the parent, which was very annoying.
Therefore, I had to prefix everything the C style which basically meant
component-name-class-name
just like how you have to prefix functions and typedefs in C for
“namespacing”.
More settings page
I had defined a base class for the div, which is as follows:
.diet-bubble-container {
    display: flex;
    border-radius: 8px;
    padding: 0.3em;
    margin: 0.3em;
}

.diet-bubble-container-blue {
    background-color: var(--vt-c-blue);
}

.diet-bubble-container-green {
    background-color: var(--vt-c-green);
}
and in the template section, I used the v-bind directive to conditionally change the color by doing something like this:
<div class="diet-bubble-container" :class="$props.showPlus ? 'diet-bubble-container-green' : 'diet-bubble-container-blue'">
    <!-- contents -->
</div>
where every DietBubble container would have the base CSS class assigned to it, and a prop would change what the second class would be (either a green bubble or a blue bubble).
And to show the icon, I did
<FontAwesomeIcon
    v-if="$props.showPlus"
    :icon="far.faSquarePlus"
    class="diet-bubble-container-tick-icon"
    style="color: var(--vt-c-white-soft)"
/>
to conditionally render the FA icon. I then assigned a CSS class to it that
would set display: none; but display: inline-block; when the parent div
was hovered like so:
.diet-bubble-container-tick-icon {
    display: none;
    /* other styles */
}
.diet-bubble-container:hover .diet-bubble-container-tick-icon {
    display: inline-block;
}
Allergies
The story is basically the same, the components are also identical. However, I also display a Font Awesome cross icon when hovering the green bubble, as one should be able to freely remove their allergies.
I just used the v-else directive, like so:
<FontAwesomeIcon
    v-if="$props.showXmark"
    :icon="far.faCircleXmark"
    class="allergy-bubble-container-x-icon"
    style="color: var(--vt-c-white-soft)"
/>
<FontAwesomeIcon
    v-else
    :icon="far.faSquarePlus"
    class="allergy-bubble-container-x-icon"
    style="color: var(--vt-c-white-soft)"
/>
Showing the icon for each allergy was also trivial, I just used v-if and
v-else-if chaining to get it done:
<span class="allergy-bubble-container-icon">
    <FontAwesomeIcon v-if="$props.allergy == Allergy.Dairy" :icon="fas.faCow" />
    <FontAwesomeIcon v-else-if="$props.allergy == Allergy.Egg" :icon="fas.faEgg" />
    <FontAwesomeIcon
        v-else-if="$props.allergy == Allergy.Gluten"
        :icon="fas.faBreadSlice"
    />
    <FontAwesomeIcon v-else-if="$props.allergy == Allergy.Seafood" :icon="fas.faFish" />
    <FontAwesomeIcon v-else-if="$props.allergy == Allergy.Shellfish" :icon="fas.faShrimp" />
    <span v-else-if="$props.allergy == Allergy.Soy">🫘</span>
    <span v-else-if="$props.allergy == Allergy.Peanut">🥜</span>
    <FontAwesomeIcon v-else-if="$props.allergy == Allergy.Wheat" :icon="fas.faWheatAwn" />
</span>
In the end, it looks like this:
Storing the state was not too hard. Local storage does only permit you to store
basic JavaScript primitives and not arrays, meaning that I had to concatenate all
elements into a string and seperate them with a separator. Originally I picked ;,
but I didn’t account for how the API requires ,, meaning that I had to do a find
and replace operation later on.
It was as simple as
const addAllergy = (allergy: Allergy) => {
    selectedAllergies.value.push(allergy)
    window.localStorage.setItem('allergies', selectedAllergies.value.join(';'))
}
to concatenate all elements into a string and store it.
I also wrote the onBeforeMount hook to do some work before a widget is mounted onto
the DOM to load in the settings, which looked like this:
onBeforeMount(() => {
    let diet = window.localStorage.getItem('diet')
    let allergies = window.localStorage.getItem('allergies')
    if (allergies === null) {
        allergies = ''
    }
    const allergies_arr = allergies.split(';')

    console.log('loaded')
    selectedDiet.value = diet !== null ? (diet as Diet) : Diet.Vegetarian
    selectedAllergies.value = allergies !== null ? (allergies_arr as Array<Allergy>) : []
})
All in all, this gives us a working settings page, with proper storage in local storage.
Woohoo!
The Pantry
Again, the pantry bubble was also trivial. I didn’t even need to store an icon (as implementing icons through basic string matching would take FAR TOO LONG), which results in a simple SFC:
<script lang="ts" setup>
import { far } from '@fortawesome/free-regular-svg-icons'
import { FontAwesomeIcon } from '@fortawesome/vue-fontawesome'

interface Props {
    itemName: string
}

defineProps<Props>()
</script>

<template>
    <div class="pantry-item-container">
        <span class="pantry-item-container-item-name">{{ $props.itemName }}</span>
        <FontAwesomeIcon
            :icon="far.faCircleXmark"
            class="pantry-item-container-x-icon"
            style="color: var(--vt-c-white-soft)"
        />
    </div>
</template>

<style scoped>
.pantry-item-container {
    display: flex;
    border-radius: 8px;
    padding: 0.3em;
    margin: 0.3em;
    background-color: var(--vt-c-blue);
}

.pantry-item-container-item-name {
    font-weight: 700;
    color: var(--vt-c-white-soft);
}

.pantry-item-container-icon FontAwesomeIcon {
    margin-top: 0.3em;
}

.pantry-item-container .pantry-item-container-x-icon {
    display: none;
    margin-top: 0.3em;
    margin-left: 0.5em;
    color: var(--vt-c-red);
}

.pantry-item-container:hover .pantry-item-container-x-icon {
    display: inline-block;
}
</style>
For the user input box, I went with a simple HTML <input> tag. Like every other
clickable “bubble”, I went with the wrap-it-in-a-null-button technique. The
template is trivial:
<button class="null-button" @click="addPantryItem(inputBoxModel)">
    <div class="pantry-add-item-container">
        <input
            type="text"
            name="textInput"
            class="pantry-view-input-box"
            v-model="inputBoxModel"
            @keyup.enter="addPantryItem(inputBoxModel)"
        /><!-- Add a pantry item when the enter key is pressed (and therefore released) -->
        <span class="pantry-add-item-container-plus-icon"
            ><FontAwesomeIcon :icon="far.faSquarePlus" style="color: var(--vt-c-white-soft)"
        /></span>
    </div>
</button>
Notice the v-model directive. That allows me to set a piece of reactive state
in TS:
const inputBoxModel: Ref<string> = ref('')
and sync the contents of the Input Box to the variable. I also use a @keyup.enter
event handler (I don’t know the name, its the @ thing) to add a pantry item
to a reactive list when enter is pressed. Of course, I had to make a hoverable
div with rounded corners to tie it all together.
I keep a reactive list pantry around like so:
const pantry: Ref<Array<string>> = ref([])
and I also set a few callbacks for this page:
onBeforeMount(() => {
    let pantry_s = window.localStorage.getItem('pantry')
    if (pantry_s === null) {
        pantry_s = ''
    }

    const pantry_arr = pantry_s.split(';')

    pantry.value = pantry_arr
})

const addPantryItem = (item: string) => {
    if (!pantry.value.includes(item)) {
        pantry.value.push(item.toLowerCase())
    }
    inputBoxModel.value = ''

    window.localStorage.setItem('pantry', pantry.value.join(';'))
}

const removePantryItem = (item: string) => {
    pantry.value = pantry.value.filter((v) => v != item)
    window.localStorage.setItem('pantry', pantry.value.join(';'))
}
which also deal with concatenating all pantry items and mounting stuff, which yields one this:
After that, I promptly went to sleep, dreaming about all the things that would go wrong the next day…
Day 2

I took a ride on this wonderful Singaporean creation again (rubber tires on concrete disguised as a train with dogshit acceleration) to come to Day 2. It was mostly as expected, I got there at 8:45 AM and got straight to the library to lock in for the day. The previous night I also fiddled with swapping out components based on JS state while keeping state across those components, and that worked.
The reason why I tested it is becuase when I fetch the data from the spoonacular API, I will only display a few recipe cards. However, when one clicks on a recipe card, data from the clicked card should transfer over to another component and be displayed as a full article. That actually worked, meaning that I could get strated.
Coding session 1
NOTE: I am not sponsored by anyone, and I don’t really like this API either. I used it because it was the first one I found. Oh well.
Getting the API key
It was as simple as creating a spoonacular account and getting it from the dashboard.
After that, I used curl to grab some JSON from
https://api.spoonacular.com/recipes/complexSearch?apiKey=<THE API KEY WAS HERE>
I then saved the JSON to a file. This is so that I don’t rate-limit myself (foreshadowing) when I have to submit my code.
I hardcoded the JSON to a file for testing in the frontend and I used node’s fs module’s
readFileSync to test the class constructor.
I made a simple TypeScript class like so:
export class Recipe {
    vegetarian: boolean
    vegan: boolean
    glutenFree: boolean
    dairyFree: boolean
    timeToCook: number
    title: string
    summary: string
    sourceURL: string
    imageURL: string
    ingredients: Array<string>
    equipment: Array<string>
    instructions: Array<string>

    /* more code here */
}
The constructor should take an object where the key is a String. However,
tsserver decided it was cool that I used a string to query the parsed
JSON object, so I had to write an interface:
export interface AnyObject {
    [key: string]: any
}
with funky syntax that I definitely did not copy from a certain LLM called ChatGPT. I then made the constructor take this in (the object happily coerced, unlike in other languages where types are real and are not imaginary constructs created by a transpiler to make developers feel better about using a toy dynamic language) ANYWAYS.
The overall idea was:
- Get the applicable diets (Veg, Vegan, Non-veg etc) from boolean values given
- Save all needed string values without change
- Loop over all the steps and save the string values and required ingredients
- Store all the ingredients in a set (ideally, I used an array because I thought the response would have no duplicates).
This is what the constructor looks like:
constructor(recipeObj: AnyObject) {
    // type annotating the whole JSON response would be too tedious
    this.vegetarian = recipeObj['vegetarian']
    this.vegan = recipeObj['vegan']
    this.glutenFree = recipeObj['glutenFree']
    this.dairyFree = recipeObj['dairyFree']
    this.timeToCook =
        (recipeObj['preparationMinutes'] as number) + (recipeObj['cookingMinutes'] as number)
    this.title = recipeObj['title']
    this.summary = recipeObj['summary']
    this.sourceURL = recipeObj['sourceUrl']
    this.imageURL = recipeObj['image']

    if (this.timeToCook == 0) {
        this.timeToCook = recipeObj['readyInMinutes'] as number
    }

    let ingredients: Array<string> = []
    let equipment: Array<string> = []
    const instructions: Array<string> = []

    const steps: Array<AnyObject> = recipeObj['analyzedInstructions'][0]['steps']
    steps.forEach((obj: AnyObject) => {
        // create a list of all new ingredients to add
        const ingredientNames = (obj['ingredients'] as Array<AnyObject>).map(
            (o: AnyObject) => o['name'] as string
        )

        const equipmentNames = (obj['equipment'] as Array<AnyObject>).map(
            (o: AnyObject) => o['name'] as string
        )

        ingredients = ingredients.concat(ingredientNames)
        equipment = equipment.concat(equipmentNames)
        instructions.push(obj['step'])
    })

    this.ingredients = ingredients
    this.equipment = equipment
    this.instructions = instructions
}
Making the recipe card itself was trivial. The template itself is quite simple:
<div class="recipe-card-container">
    <img :src="props.recipeInfo.imageURL" class="recipe-card-image" />
    <div class="recipe-card-info">
        <h1 class="recipe-card-title">{{ title }}</h1>
        <RecipeInfoDisplay :recipe-info="$props.recipeInfo" />
        <p v-html="$props.recipeInfo.summary" class="recipe-card-description"></p>
    </div>
</div>
(Notice the interpolation syntax with {{ title }}, that is to interpolate JS state into a template.)
The CSS was not so easy, I had to display the image and the recipe card inline, and then everything else as block.
The Recipe Info Display detailed the information about the recipe. It kinda looked like this:
<template>
    <div
        class="recipe-info-display-container recipe-info-display-container-green"
        v-if="$props.recipeInfo.vegetarian"
    >
        <span>
            <FontAwesomeIcon :icon="fas.faLeaf" />
            <span class="recipe-info-display-span">Vegetarian</span>
        </span>
    </div>
    <div
        class="recipe-info-display-container recipe-info-display-container-green"
        v-if="$props.recipeInfo.vegan"
    >
        <span>
            <FontAwesomeIcon :icon="fas.faSeedling" />
            <span class="recipe-info-display-span">Vegan</span>
        </span>
    </div>
    <div
        class="recipe-info-display-container recipe-info-display-container-green"
        v-if="$props.recipeInfo.glutenFree"
    >
        <span>
            <FontAwesomeIcon :icon="fas.faBreadSlice" />
            <span class="recipe-info-display-span">Gluten Free</span>
        </span>
    </div>
    <div
        class="recipe-info-display-container recipe-info-display-container-green"
        v-if="$props.recipeInfo.dairyFree"
    >
        <span>
            <FontAwesomeIcon :icon="fas.faCow" />
            <span class="recipe-info-display-span">Dairy Free</span>
        </span>
    </div>
    <div class="recipe-info-display-container recipe-info-display-container-blue">
        <span>
            <FontAwesomeIcon :icon="far.faClock" />
            <span class="recipe-info-display-span">{{ $props.recipeInfo.timeToCook }}min</span>
        </span>
    </div>
</template>
Yes, it most definitely looks long, but it really is just a bunch of v-if directives.
In the end, you get a recipe card:

Simple. The CSS is bog-standard:
.recipe-card-container {
    display: flex;
    padding: 1rem;
    margin: 0.5rem;
    margin-bottom: 1em;
    border-radius: 12px;
    transition: 300ms;
    max-height: 12.5rem;
    background-color: var(--vt-c-divider-dark-2);
}

.recipe-card-description {
    max-height: 4.5rem;
    overflow: hidden;
}

.recipe-card-title {
    font-weight: 600;
}

.recipe-card-image {
    /* scaled 70%, all images from spoonacular are of equal dimension */
    width: 218px;
    height: 162px;
    margin-right: 1em;
}
I also really wanted a hover effect, which is as simple as adding a box shadow:
.recipe-card-container:hover {
    box-shadow: 0 4px 20px var(--vt-c-indigo);
}
Snack #1
It really was not too interesting. There was a free donut, but it was miniscule and I put it all in my mouth in one go. That wasn’t so good.
I then decided to go downstairs to the café once again, to get a Vadai and Samosa. I thought about how well my idea developed into my final program while eating my food.

If you don’t know what a vadai is, it’s basically a salty fermented donut. It isn’t really made from a dough but from something more similar to a batter, and it is a lot more aerated. It also tastes Indian, unlike a Donut.
I really had 0 time to waste, though. I spent basically no time eating my food and I immediately went back up to work on the article display.
Coding session II
By this point, my whole body was freezing cold from the Air Conditioning unit constantly blowing on me, but I really couldn’t do much about it at this point. I really just had to push through.
At that point, I only had one object with the recipe data, meaning that it was really easy to test the description view.
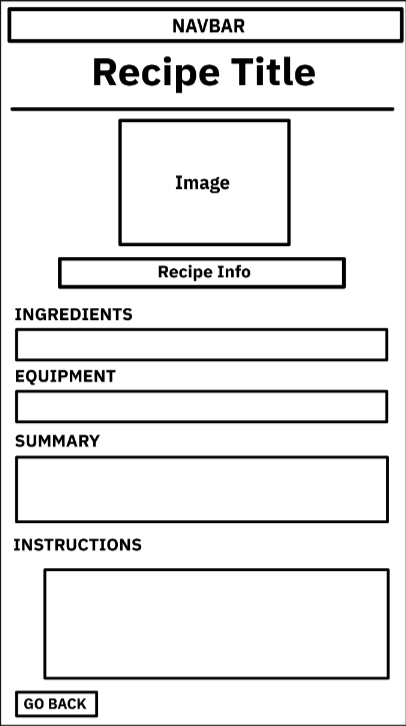
The overall layout was to be:
- The navbar (stays intact)
- The title (heading 1, centered)
- A divider
- The image (centered)
- Recipe Info
- The ingredients
- The Equipment
- The summary
- The steps
- A go back button
A diagram may help:
Putting everything together was quite simple. I had just made a component that contains a label that you specify and a separator which looked like this:
<template>
    <p class="divider-item-label"><slot></slot></p>
    <hr style="margin-bottom: 0.3em" />
</template>

<style scoped>
.divider-item-label {
    margin-bottom: 0.3em;
    display: flex;
    justify-content: center;
}
</style>
An interlude
At this point, I was really, really, really cold (my hands were about to freeze), so I decided to go downstairs to the area right below the 2nd to 3rd floor escalator.
That is where I finished the article display page.
I pass through the array of recipes from the home page to the widget via a prop, and the index of the recipe. The component then only needs to do a simple array index.
Here I render the list of recipes in a for loop and keep the index:
<div v-if="recipes.length > 0">
    <div v-for="(recipe, index) in recipes" :key="index">
        <button class="null-button" @click="openRecipe(index)">
            <RecipeCard :recipe-info="recipe"></RecipeCard>
        </button>
    </div>
</div>
openRecipe then swaps a conditional value which then controls which page
is active, and sets the index:
const showMain = ref(true)

/* later */

const openRecipe = (index: number) => {
    selectedRecipeIndex.value = index
    showMain.value = !showMain.value
}
The component only takes in 2 props:
interface Props {
    recipeList: Array<Recipe>
    index: number
}

const props = defineProps<Props>()
const recipe = props.recipeList[props.index]
the recipe list and then the index, and it is rendered like so:
<div v-else>
    <RecipeView :recipe-list="recipes" :index="selectedRecipeIndex"></RecipeView>

    <button class="back-home-button" @click="showMain = !showMain">
        <FontAwesomeIcon :icon="fas.faCircleArrowLeft" />
        <span>GO BACK</span>
    </button>
</div>
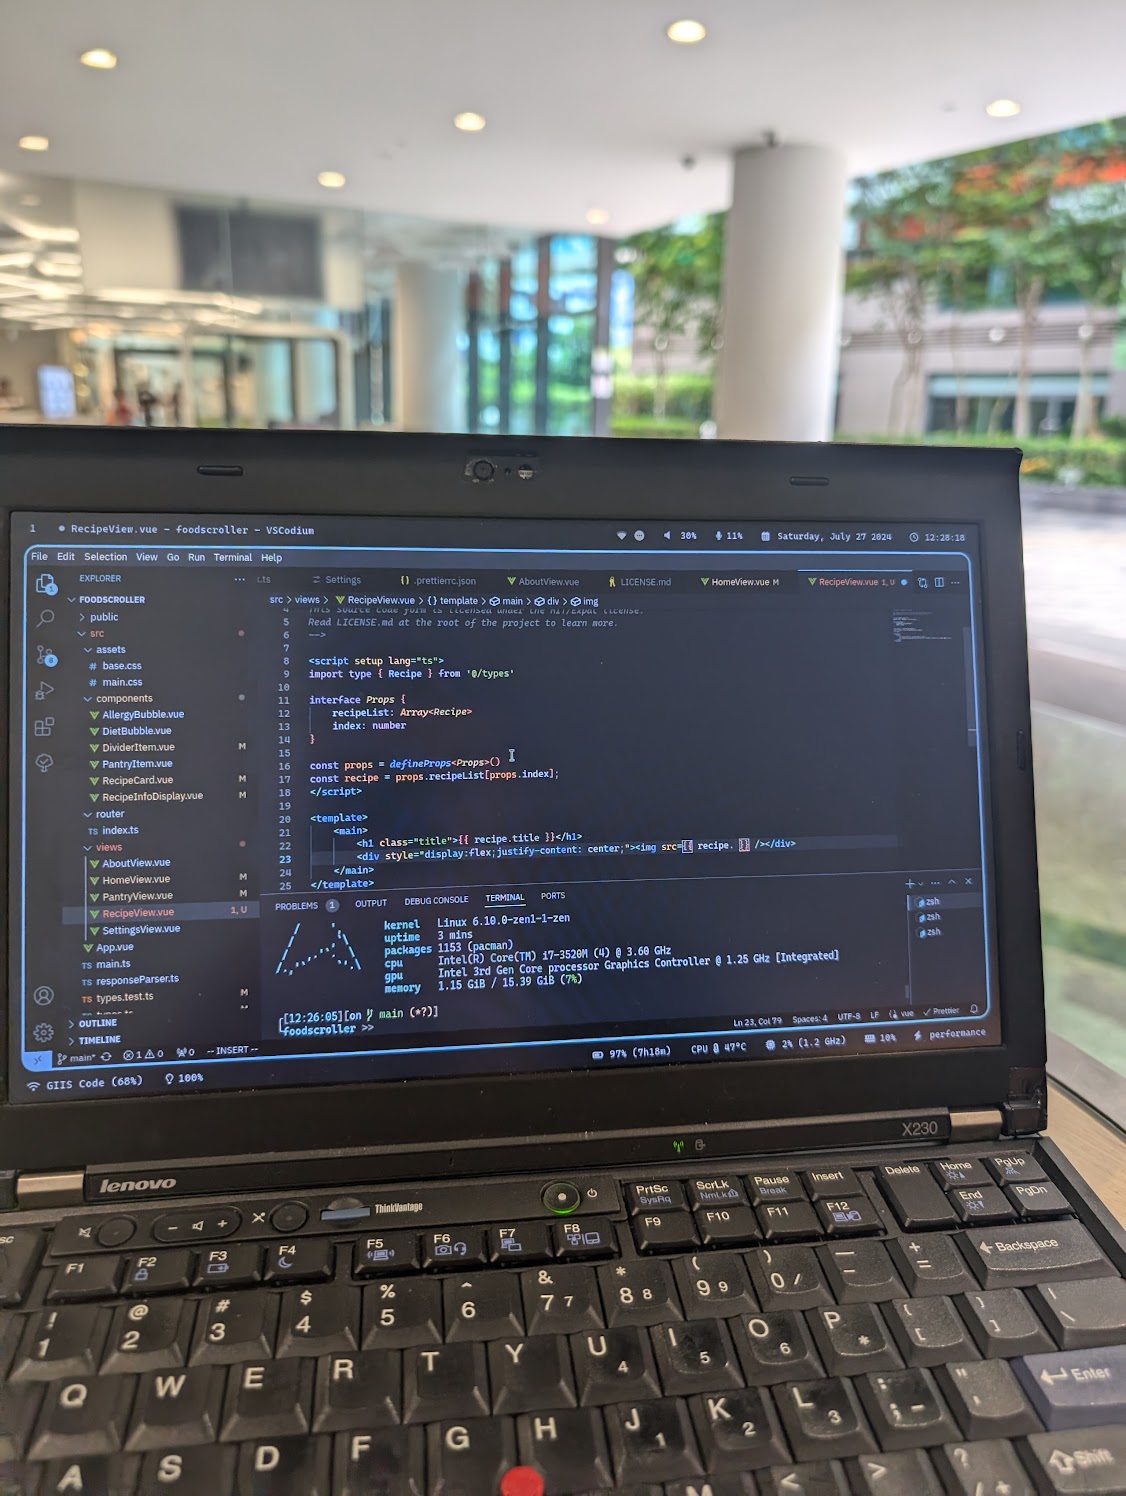
The template is (again) quite simple:
<template>
    <main>
        <h1 class="title" style="text-align: center; font-size: 2.5rem">{{ recipe.title }}</h1>
        <br />
        <hr />
        <br />
        <div style="display: flex; justify-content: center">
            <img :src="recipe.imageURL" />
        </div>
        <br />
        <div style="display: flex; justify-content: center">
            <RecipeInfoDisplay :recipe-info="recipe" />
        </div>

        <h2 class="subtitle">INGREDIENTS</h2>
        <BubbleListView :items="recipe.ingredients" />

        <h2 class="subtitle">EQUIPMENT</h2>
        <BubbleListView :items="recipe.equipment" />

        <h2 class="subtitle">SUMMARY</h2>
        <div class="recipe-body-container">
            <p v-html="recipe.summary" />
        </div>
        <br />
        <h2 class="subtitle">INSTRUCTIONS</h2>
        <ol>
            <li v-for="(instruction, index) in recipe.instructions" :key="index">
                {{ instruction }}
            </li>
        </ol>
        <br />
    </main>
</template>
After going back up and finishing all the code I showed you, here’s what the display looks like.
Since this article is getting too long once again, I will post a fourth and final part, which details my troubles connecting the API to my app and some final remarks. So until then, cheers!